I made my version of Lori Holt's fun "Plow Day", but I named mine "Jane Deere".
http://beeinmybonnetco.blogspot.ca/2015/08/farm-girl-friday-week-17-starters-and.html
I started with the plow. There are about a million pieces to it, but it went together pretty well.
Then I made a thousand pinwheels. I am thrilled with the results. Pardon the wrinkles; she has been folded up too long.
Given my colour choices, I wanted to name my version "Jane Deere" and I did not use the John Deere font as I wanted her to have her own identity.
I can't wait to get this one quilted up.
I used the left over scraps from this project to make my Aloha, Pink Lady quilt (http://lazylabquiltcompany.blogspot.ca/2016/09/wow-its-been-ages.html)
Friday, December 9, 2016
Thursday, December 1, 2016
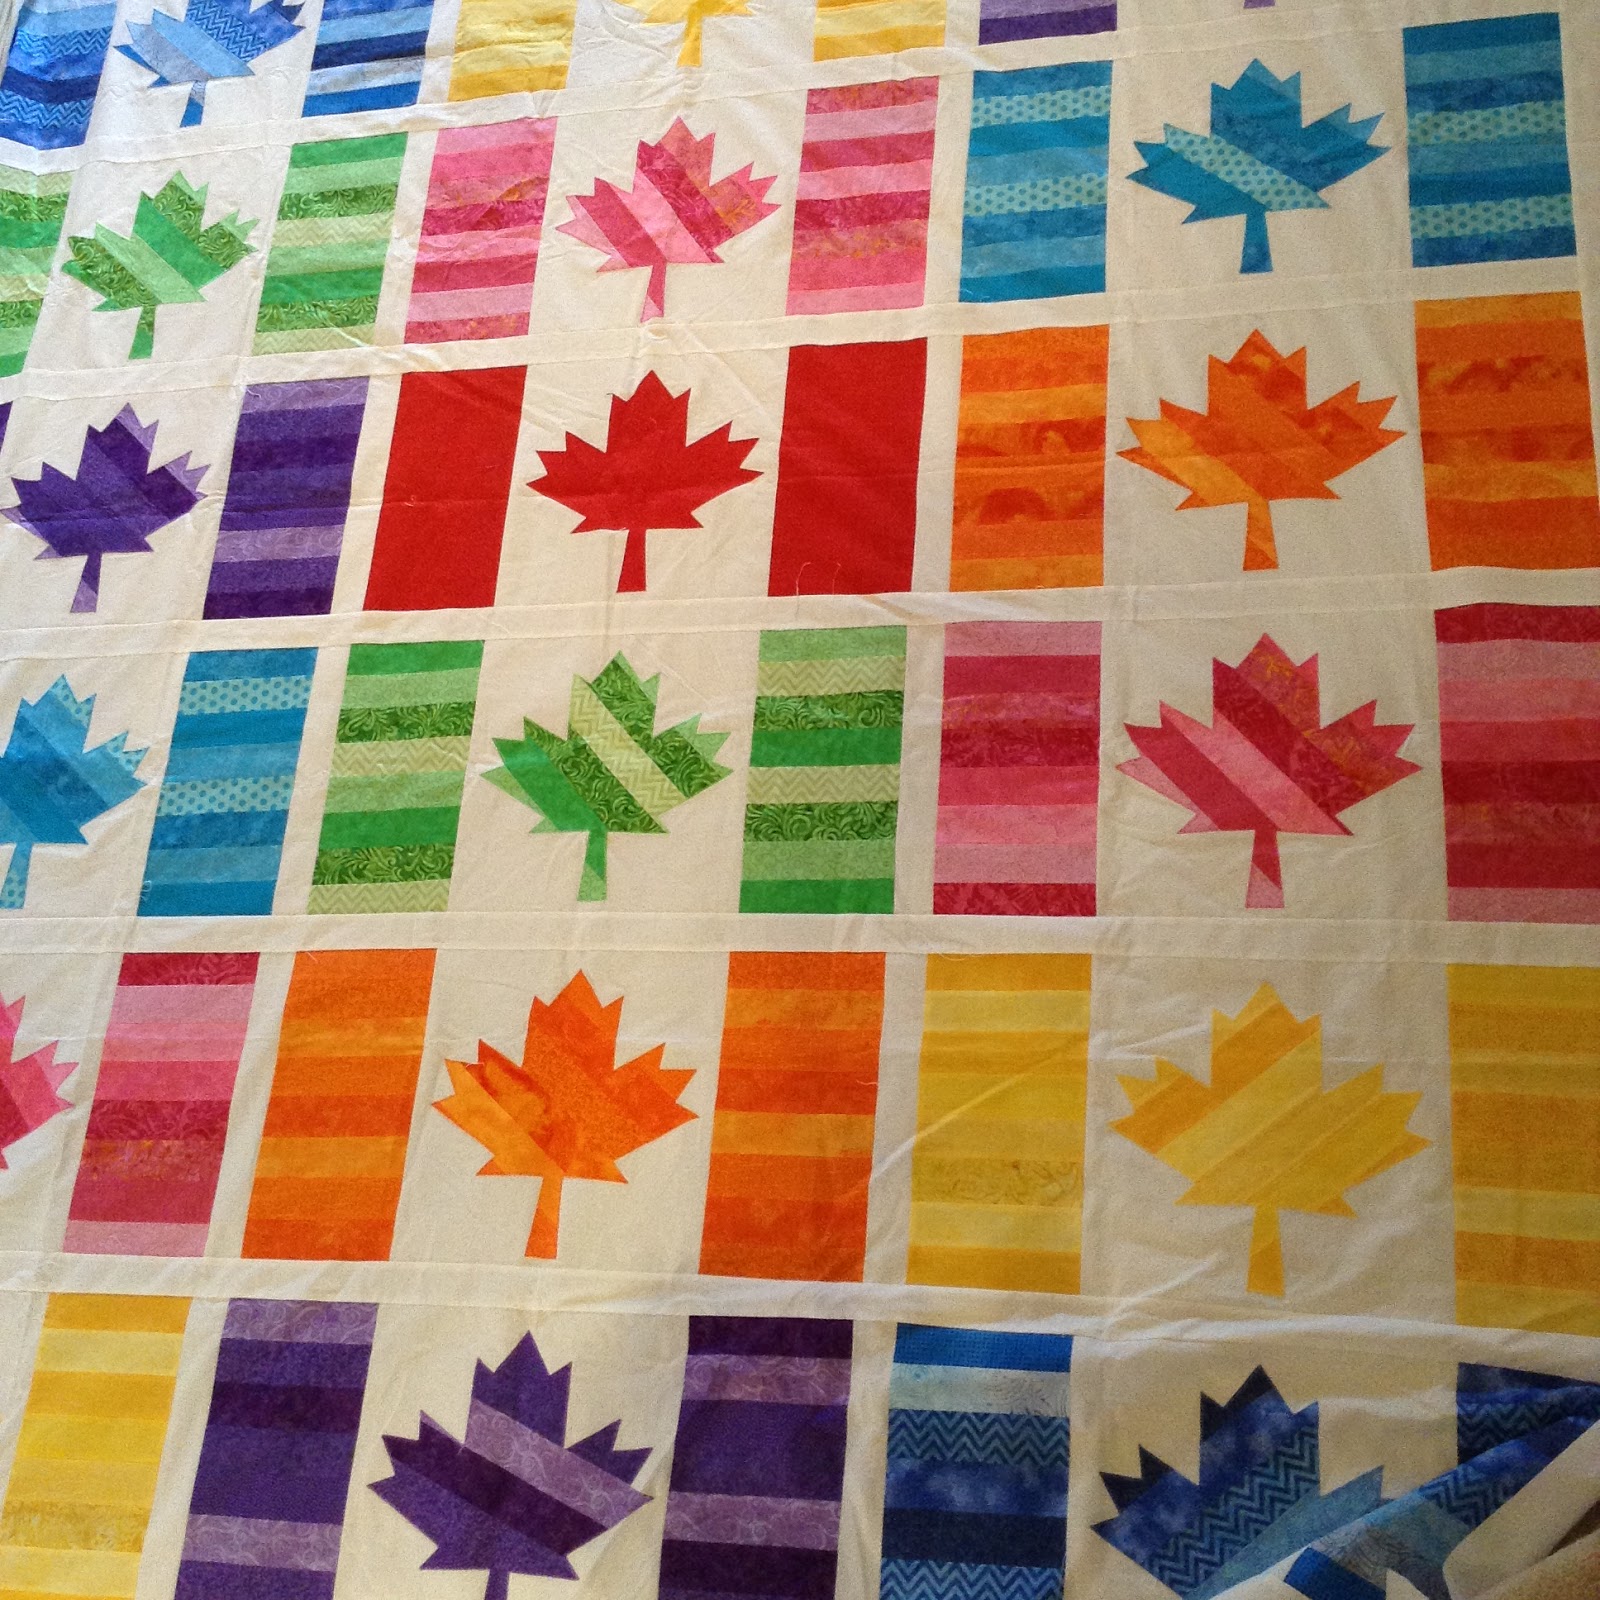
Oh Canada Quilt Top
I made this fun Oh Canada quilt top. The pattern is from Cheryl Arkison.
http://www.hyggeligt.ca/oh-canada-pattern-by-cheryl-arkison/
I have the backing and batting and I am hoping to have it quilted up by the New Year. We'll see! It would be great to have it done for Canada's 150th anniversary celebrations!
http://www.hyggeligt.ca/oh-canada-pattern-by-cheryl-arkison/
I have the backing and batting and I am hoping to have it quilted up by the New Year. We'll see! It would be great to have it done for Canada's 150th anniversary celebrations!
Friday, November 25, 2016
Denim Quilt - Quilted
I showed this quilt in July 2015 as a completed top, but not as a completed quilt. Here it is all quilted up!
Tuesday, November 22, 2016
Handy-Dandy Ruler Tote
I attended a small class with friends on Saturday and made this super handy ruler tote for attending retreats.
It measures 25.5" X 40" flat. It has two sleeves (25.5" X 22.5") on either side into which you can insert your 24" X 18" cutting matt, your sewing extension table, etc, etc. Onto these sleeves you sew pockets for your rulers and accessories.
I chose to sew only 3 pockets; one for my 24.5" X 6.5" ruler (my favourite ruler), a small one for my 6.5" X 6.5" ruler, and another for my rotary cutter. Most of the other attendees sewed many more pockets than I did. One of the benefits of fewer pockets is less weight; one of the obvious drawbacks is not having enough pockets. Time will tell.
In the meantime, I am delighted with the result. I noticed that I learned a lot from making the bowling bag that I used with this tote. For instance, I used a scant 1/8" seam to baste everything together knowing that my binding seam would be 1/4" and I didn't want the basting thread to show. You always learn something.
I have also noticed that I neglect to post in-progress photos on my blog. I'll try to make an effort to post more as I go photos.
There is 24" X 18"cardboard in the sleeves to keep them stiff and ensure nothing gets warped or bent.
Here is a photo of the items placed on top of the pockets.
Here is one of the 2 large sleeves.
Here is the other.
Here is the outer front of the bag.
It measures 25.5" X 40" flat. It has two sleeves (25.5" X 22.5") on either side into which you can insert your 24" X 18" cutting matt, your sewing extension table, etc, etc. Onto these sleeves you sew pockets for your rulers and accessories.
I chose to sew only 3 pockets; one for my 24.5" X 6.5" ruler (my favourite ruler), a small one for my 6.5" X 6.5" ruler, and another for my rotary cutter. Most of the other attendees sewed many more pockets than I did. One of the benefits of fewer pockets is less weight; one of the obvious drawbacks is not having enough pockets. Time will tell.
In the meantime, I am delighted with the result. I noticed that I learned a lot from making the bowling bag that I used with this tote. For instance, I used a scant 1/8" seam to baste everything together knowing that my binding seam would be 1/4" and I didn't want the basting thread to show. You always learn something.
I have also noticed that I neglect to post in-progress photos on my blog. I'll try to make an effort to post more as I go photos.
There is 24" X 18"cardboard in the sleeves to keep them stiff and ensure nothing gets warped or bent.
Here is a photo of the items placed on top of the pockets.
Here is one of the 2 large sleeves.
Here is the other.
Here is the outer front of the bag.
Thursday, November 17, 2016
CooKoo Crazy For Denim Quilts
Have I mentioned lately that I am crazy about demin quilts?
Here is one I completed in spring. I used Natalia Bonner's instructions and laid it out like a hardwood floor. That allowed for maximum use of the jean legs with little waste.
I added some applique flowers (as no quilt is a "Melanie" quilt without embellishment) and rick-rack for the stems with sprout out of a jean pocket.
As the quilt is made up out of about 10 pairs of jeans, it is super heavy. The manager at my LQS recommended that I do not use batting and I am so glad that I took her suggestion as the quilt weighs about 10 pounds! I just added a flannel back and quilted her up using a loop-de-loop for the first time in a variegated thread.
Although it is a super simple design, I positively love this quilt. I love the look, the weight, the quilting, the thread, the backing - EVERYTHING. This is a family favourite!
Can't wait to make another and already have lots of jeans for the next one.
Here is one I completed in spring. I used Natalia Bonner's instructions and laid it out like a hardwood floor. That allowed for maximum use of the jean legs with little waste.
I added some applique flowers (as no quilt is a "Melanie" quilt without embellishment) and rick-rack for the stems with sprout out of a jean pocket.
As the quilt is made up out of about 10 pairs of jeans, it is super heavy. The manager at my LQS recommended that I do not use batting and I am so glad that I took her suggestion as the quilt weighs about 10 pounds! I just added a flannel back and quilted her up using a loop-de-loop for the first time in a variegated thread.
Although it is a super simple design, I positively love this quilt. I love the look, the weight, the quilting, the thread, the backing - EVERYTHING. This is a family favourite!
Can't wait to make another and already have lots of jeans for the next one.
Monday, November 14, 2016
Another Jean Quilt
Well, I just can't get enough of them so I made another jean quilt.
A friend gave me all of her old jeans and I turned them into a quilt using Natalia Bonner's pattern/recommendation http://www.pieceandquilt.com/2010/01/simply-denim-quilt-tutorial.html
My friend is part of a female motorcycle club named the Chrome Divas, so that is what I appliqued on the quilt.
As always, I used a flannel back to keep it cuddly.
I did not use a batting on this one. It measures 78X80 and as it is made up of 10+ pairs of jeans, it is super heavy. A batting would make it feel like a ton of bricks!
I am happy with how the quilting turned out. Used a loop de loop in a variegated thread.
This is my second fully completed quilt in 18 days! That is a personal record! Usually I'm pretty quick with getting the tops completed, and then they languish waiting to be quilted. Feeling very proud of myself!
Hope my friend likes it.
You can see my other jean quilts here:
http://www.pieceandquilt.com/2010/01/simply-denim-quilt-tutorial.html
http://lazylabquiltcompany.blogspot.ca/2015/07/jean-quilt.html
A friend gave me all of her old jeans and I turned them into a quilt using Natalia Bonner's pattern/recommendation http://www.pieceandquilt.com/2010/01/simply-denim-quilt-tutorial.html
My friend is part of a female motorcycle club named the Chrome Divas, so that is what I appliqued on the quilt.
As always, I used a flannel back to keep it cuddly.
I did not use a batting on this one. It measures 78X80 and as it is made up of 10+ pairs of jeans, it is super heavy. A batting would make it feel like a ton of bricks!
I am happy with how the quilting turned out. Used a loop de loop in a variegated thread.
This is my second fully completed quilt in 18 days! That is a personal record! Usually I'm pretty quick with getting the tops completed, and then they languish waiting to be quilted. Feeling very proud of myself!
Hope my friend likes it.
You can see my other jean quilts here:
http://www.pieceandquilt.com/2010/01/simply-denim-quilt-tutorial.html
http://lazylabquiltcompany.blogspot.ca/2015/07/jean-quilt.html
Thursday, November 10, 2016
Go Fish Quilt
I was going through my photos and realized that I have neglected to add them to the blog.
Here is my Go Fish quilt for my grandbaby, Brantley.
It is a pattern by a favourite designer, Erin Russek.
I love it and I hope he does, too.
I doubled up the batting (my first time doing that) and I really liked the "puffiness".
The backing is flannel to make it soft and cuddly.
Here is my Go Fish quilt for my grandbaby, Brantley.
It is a pattern by a favourite designer, Erin Russek.
I love it and I hope he does, too.
I doubled up the batting (my first time doing that) and I really liked the "puffiness".
The backing is flannel to make it soft and cuddly.
Subscribe to:
Posts (Atom)